📝 创建第一个Hello World的工程
该教程演示如何在SDK中添加自己的新工程。
在 application/samples 中创建一个 demo 代码目录

添加用户自定义代码 demo.c、demo.h,同时创建一个空白 CMakeLists.txt 文件。

在 CMkakeLists.txt 中为组件模板添加源码文件以及源码头文件路径
set(SOURCES_LIST ${CMAKE_CURRENT_SOURCE_DIR}/demo.c ) set(PUBLIC_HEADER_LIST ${CMAKE_CURRENT_SOURCE_DIR} ) set(SOURCES "${SOURCES_LIST}" PARENT_SCOPE) set(PUBLIC_HEADER "${PUBLIC_HEADER_LIST}" PARENT_SCOPE)- 在
SOURCES_LIST中添加.c文件,多个.c文件直接换行加在后面即可; - 在
PUBLIC_HEADER_LIST中添加.h路径,多个路径直接换行加在后面即可; CMAKE_CURRENT_SOURCE_DIR表示当前CMkakeLists.txt的路径。
- 在
在demo.c、demo.h中添加自己的业务代码,这里以在demo.c中添加一个创建任务,并在任务中打印消息为例,
app_run函数为应用程序的入口函数。#include "common_def.h" #include "osal_debug.h" #include "cmsis_os2.h" #include "app_init.h" #define TASKS_TEST_TASK_STACK_SIZE 0x1000 #define TASKS_TEST_TASK_PRIO (osPriority_t)(17) #define TASKS_TEST_DURATION_MS 1000 static void *tasks_test_task(const char *arg) { unused(arg); while (1) { osal_printk("Hello World BearPi\r\n"); osDelay(TASKS_TEST_DURATION_MS); } return NULL; } static void tasks_test_entry(void) { osThreadAttr_t attr; attr.name = "TasksTask"; attr.attr_bits = 0U; attr.cb_mem = NULL; attr.cb_size = 0U; attr.stack_mem = NULL; attr.stack_size = TASKS_TEST_TASK_STACK_SIZE; attr.priority = TASKS_TEST_TASK_PRIO; if (osThreadNew((osThreadFunc_t)tasks_test_task, NULL, &attr) == NULL) { /* Create task fail. */ } } /* Run the tasks_test_entry. */ app_run(tasks_test_entry);将demo组件的内的顶层 CMakeLists 添加到其上一层 CMakeLists 下,使构建系统能够执行到 demo 组件的 CMake。

另外也可通过例如
CONFIG_ENABLE_MY_SAMPLE宏控制是否编译demo代码,
此功能需要在samples/Kconfig中添加以下代码
config ENABLE_MY_SAMPLE
    bool
    prompt "Enable the Sample of demo."
    default n
    depends on SAMPLE_ENABLE
    help
        This option means enable the sample of products.
在Windows下编译操作
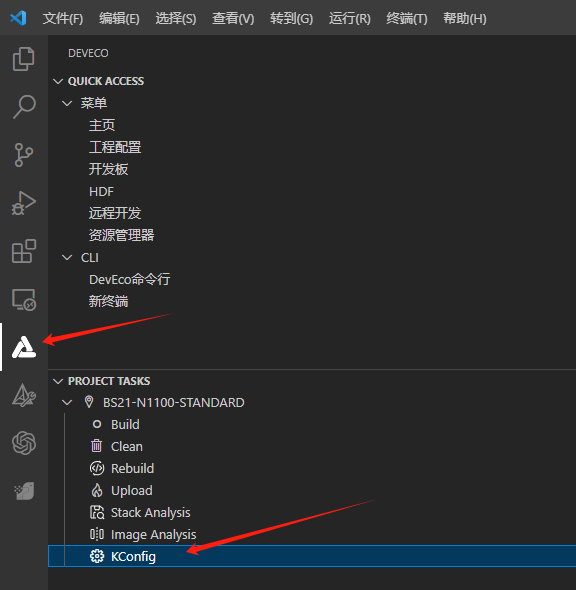
点击左侧的“KConfig”,打开配置界面,选中 Enable the Sample of demo并保存即可编译demo工程.


在Ubuntu下编译操作
- 在MobaXterm中输入
./build.py menuconfig,打开配置界面,选中 Enable the Sample of demo并保存即可编译demo工程

