
E53_IS1
本示例将演示如何在 BearPi-HM_Nano 2 开发板上使用 E53_IS1 实现人体红外感应,当检测到有人走动时,蜂鸣器发出报警。
一、准备工作
参考BearPi-HM_Nano 2 十分钟上手教程完成开发环境搭建、代码获取等工作,以及熟悉代码的编译和烧录流程。
二、硬件设计
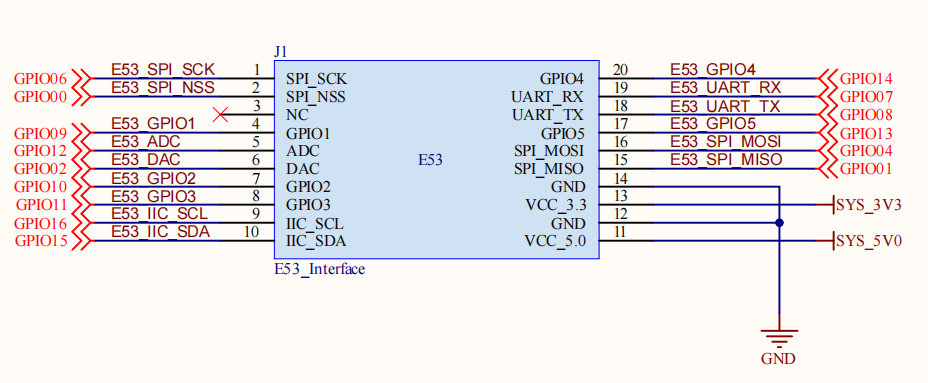
本案例将用到 E53_IS1 红外感应扩展板与 BearPi-HM_Nano 2 开发板,其中 E53_IS1 扩展板原理图如下,当检测到人时,传感器会输出高电平,通过对 GPIO_10 的监测就能判断是否有人走动。
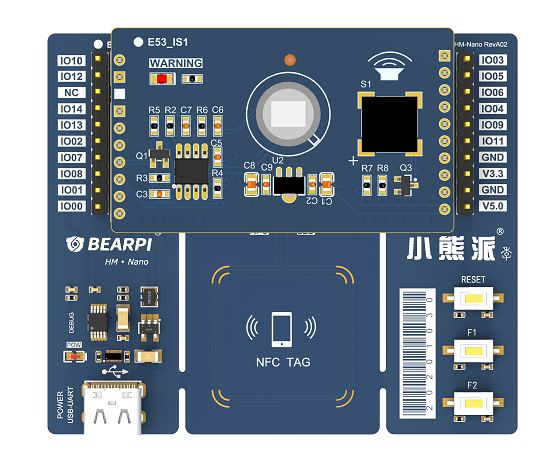
E53_IS1 红外感应扩展板与 BearPi-HM_Nano 2 开发板安装如下图所示
三、软件设计
主要代码分析
打开device\bearpi\bearpi_hm_nano2\app\C5_e53_is1_infrared\e53_is1_example.c,首先调用 E53_IS1_Init() 函数初始化 E53_IS1 所接的引脚的功能,然后调用 E53_IS1_Read_Data() 函数设置触发的回调函数 Beep_Alarm(),系统启动后会通过 osEventFlagsWait()函数让 Example_Task 任务一直等待事件标志位 FLAGS_MSK1,当检测到人后,Beep_Alarm()函数会发送事件标志位,Example_Task 任务继续运行开启蜂鸣器报警 3 秒钟 然后关闭蜂鸣器继续等待下一次触发事件。
static void BeepAlarm(char *arg)
{
    (void)arg;
    printf("BeepAlarm\r\n");
    osEventFlagsSet(g_eventFlagsId, FLAGS_MSK1);
}

static void ExampleTask(void)
{
    int ret;
    E53IS1Init();
    ret = E53IS1ReadData(BeepAlarm);
    if (ret != 0) {
        printf("E53_IS1 Read Data failed!\r\n");
        return;
    }
    while (1) {
        osEventFlagsWait(g_eventFlagsId, FLAGS_MSK1, osFlagsWaitAny, osWaitForever);
        BeepStatusSet(CTL_ON);
        osDelay(TASK_DELAY_3S);
        BeepStatusSet(CTL_OFF);
    }
}
E53_IS1 API分析
本案例主要使用了以下API完成人体红外感应。
E53IS1Init()
void E53IS1Init(void);
描述:
初始化E53_IS1。
E53IS1ReadData()
void E53IS1ReadData(E53IS1CallbackFunc func);
描述:
设置人体感应触发的回调函数。
四、编译调试
修改 BUILD.gn 文件
修改device\bearpi\bearpi_hm_nano2\app路径下 BUILD.gn 文件,指定 e53_is1_example 参与编译。
# "C1_e53_sf1_mq2:e53_sf1_example",
# "C2_e53_ia1_temp_humi_pls:e53_ia1_example",
# "C3_e53_sc1_pls:e53_sc1_example",
# "C4_e53_sc2_axis:e53_sc2_example",
"C5_e53_is1_infrared:e53_is1_example",
# "C6_e53_st1_gps:e53_st1_example",
运行结果
示例代码编译烧录代码后,按下开发板的 RESET 按键,人员靠近开发板,蜂鸣器开始报警。

